Draw with a pencil step by step. Hatching
We will need 2H, HB, 2B, 4B and 6B pencils, an eraser and drawing paper. This article is recommended for artists of all ages and backgrounds.
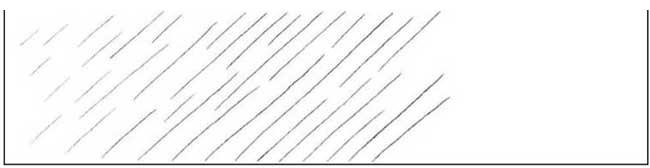
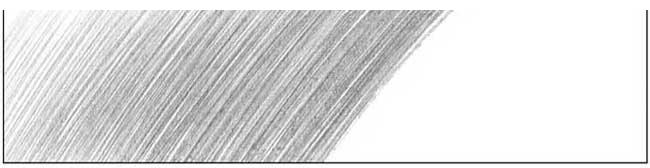
Fundamentals of smooth hatching (gradient hatching). In this section, you'll use a 2B pencil to draw a very simple gradient, drawing strokes of varying lengths either far apart or close together. Gradient shadow creation is a transition from dark to light or from light to dark. Hatching means lines that are drawn closely together to create the illusion of a shadow. Shading refers to the different shades that give a three-dimensional look to a drawing. 1. Before you start drawing, take a few minutes to find natural hand movements. Make several parallel lines. As you draw, pay attention to how these lines are drawn. Try different ways to move your pencil, rotate the paper, or change the angle of your lines until you find a position and movement that works for you. 2. Draw the first set of lines where the hatching takes up a little more than half of your sheet horizontally. On the left side of the paper, lightly press down on your 2B pencil to draw light lines far apart and in small numbers. Closer to the middle, there are fewer small lines, more long ones, and they are a little closer to each other. By using hatching lines of different lengths, you can make an imperceptible transition from a shadow of one intensity to a shadow of another intensity.
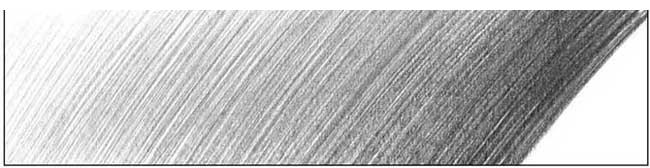
 3. Draw more lines darker and closer together until you reach the end of the paper (horizontally). Add a few more short lines between your individual lines if the transition between tones is not very smooth.
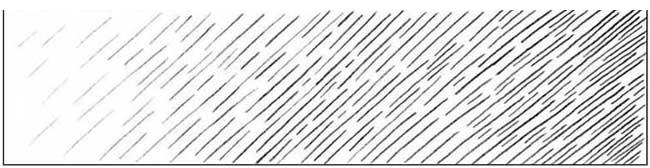 4. Draw more lines closer together, all the way to the end, until the end result is dark. Start making your lines closer together from 2/3 of the sheet. Note that the lines that make up the dark areas are very close together and the paper is very hard to see, but still visible.
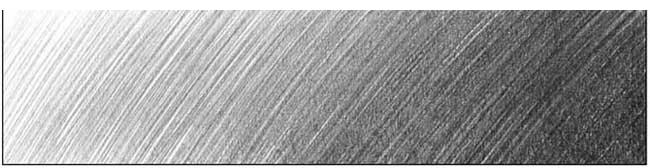
Gradient shading. Before starting this part of the tutorial, draw lines with each pencil and see how they differ. 2H is the lightest (hardest) and 6B pencil is the darkest (softest). 2H is ideal for creating light tones, HB and 2B are good for medium tones, 4B and 6B for creating dark tones. You will use them for a smooth transition, and pressing on the pencil also changes the color.
5. On the left side of the paper, lightly pressing the 2H pencil, draw light lines. As you move closer to the middle, make your lines closer to each other and press a little more on the pencil. Take an HB and/or 2B pencil to achieve a medium shading tone in your work. Continue to make your tone darker as you move to the right.
 6. Using an HB and/or 2B pencil(s), draw dark shading almost to the end of your sheet.
 7. Using pencils 4B and 6B draw the darkest tones. Make sure your pencils are sharp. Draw lines close to each other. 6B will create a very dark shade. If you notice that the transition between your tones is sharp, you can make it smoother by adding a few more short lines between your lines.
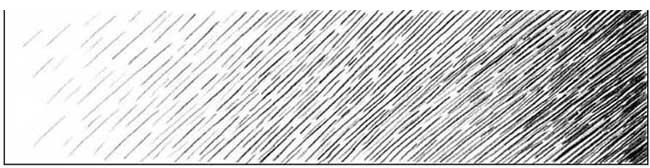
 Look at the smooth transition between tones in the picture below. The individual lines are hardly noticeable because they are very close to each other. No smudging has been used here, although it looks almost like a continuous gradient. Patience and a lot of practice and you will be able to do so in the aftermath. Try it!
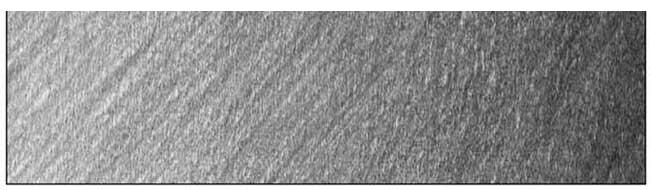
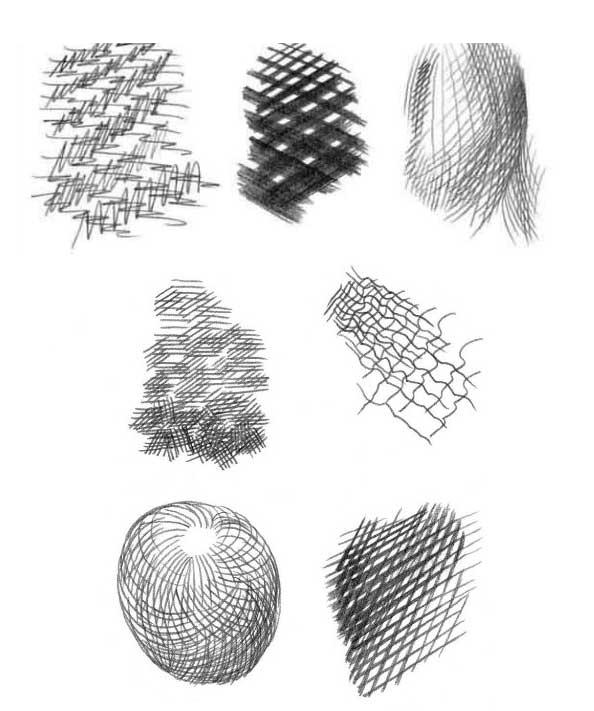
8. Use curved lines to draw the transition of 10 different tones from light to dark, the drawing shows the texture of the hair. The author divided the sheet in width into 10 parts, so that you understand how the tone changes, in which each next one is darker than the previous one. Curves are drawn with the letters C and U. When drawing hair in humans and wool in animals, curved hatching lines should follow the contour of the shape of the head and body.
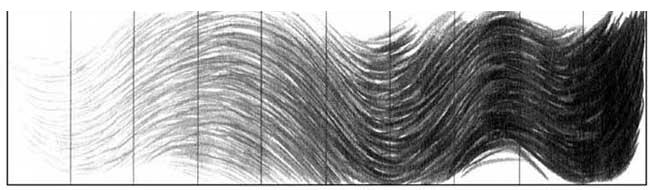 9. In practice, use more different tones, drawing from light to dark. Your pencils play an important role in creating hatching. Beginners can use three or four pencils. Most often the author uses 2H, HB, 2B, 4B and 6B pencils. With a full range of pencils from 6H-8B, the potential range of tones that can be done is endless.
Author: Brenda Hoddinot, website (source)
Leave a Reply