How to draw a stone with a pencil step by step
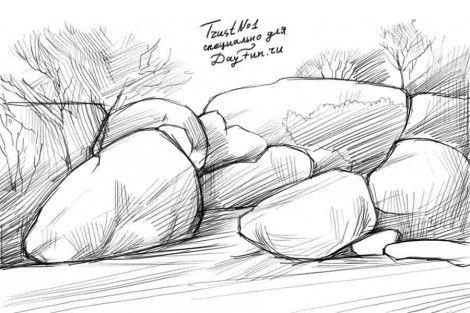
Lots of rocks can add interest to any landscape in a landscape. There are various types of rocks: sandstone, shale, limestone, volcanic rocks, boulders. This lesson will be very specific and we will be studying the stone in close-up.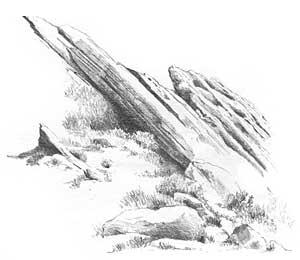
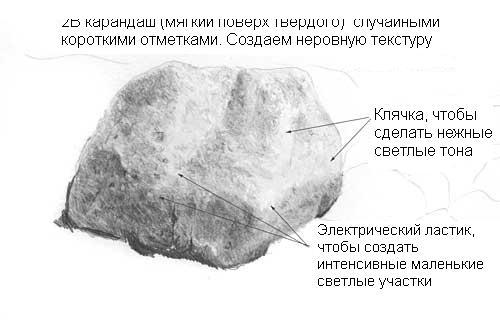
Materials needed: F (this pencil is between HB and B) and 2B 0,5 mechanical pencils, 4H and 2H collet pencils, Blu-Tack or nag, electric eraser, Strathmore 300 Series Bristol Board smooth paper.
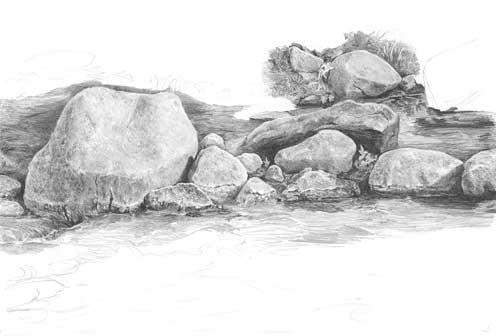
Sketch. Never underestimate the power of a sketch. I rarely just sit and watch TV, but when I do, I take a folder of photos and sketch. Here is a sketch from this group.
Creation of volume and form.
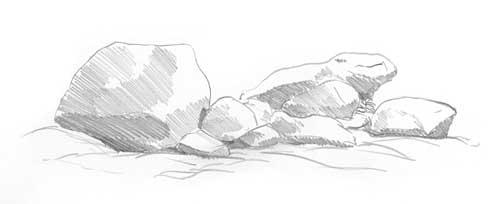
At first glance, it seems that they are easy to draw. I find they are a little more complicated than that. They must have volume and shape. Light and shadow play an important aspect in drawing realistic rocks. I think the best comparison is a cube. In order to create this XNUMXD shape, we must use light and shadow. The top of the cube with the most direct sunlight is the brightest. At first glance it may seem that the stones are easy to draw. It seems to me that this is not entirely true - they should have volume and shape. Light and shadow play an important role in depicting realistic rocks. 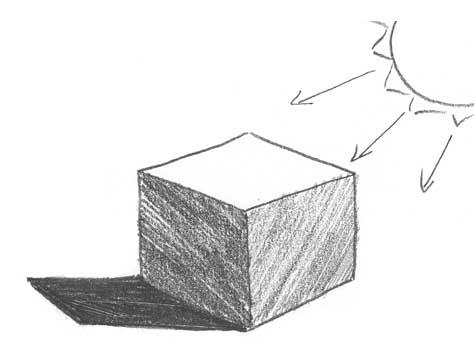 This sketch shows the stones, showing their angles and planes, with the light in the upper right corner taken into account.
 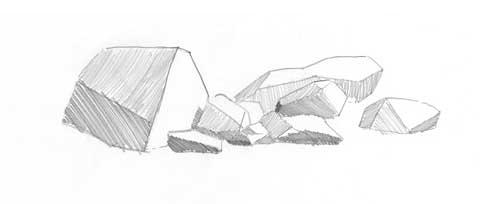 This sketch shows rocks with softened corners, but the planes that create the three-dimensional shape of the rocks are still visible.
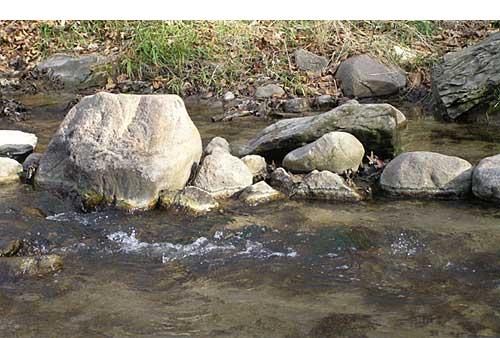
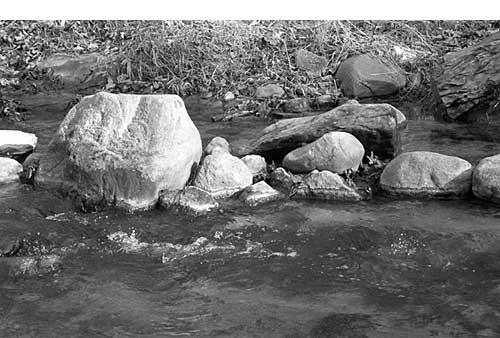
 Many rock drawing lessons stop at this point. Will they look in a realistic landscape? There are few tones and details. We look at the photo. The image is shown in color and black and white. I love to draw and learn by using two images. Grayscale helps to find tones, while color helps in details.
STEP 1. We are going to draw a big boulder on the left. I start sketching the rock in the dark areas with a 2B pencil. The light areas are drawn with the F pencil. Using short random marks, I concentrate on the notches and shadowed areas. Look, you should draw all the dark areas of the stone in this step.
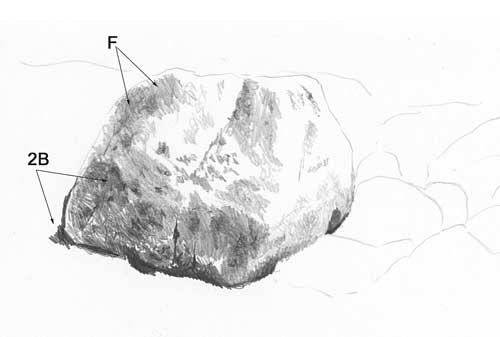
Step 2 Once you have all the preliminary details drawn, take a bevelled collet pencil and apply the strokes in a smooth, even layer over the entire surface. In the lighter areas I use 4H and 2H in the darker areas. Be aware of lighting on planes and corners.
STEP 3. Now the fun begins! With a soft mechanical pencil, we start creating textures! I use short random marks to create pits and a rough surface. Use a softer pencil over a hard one. We know that a soft pencil on top of a hard one creates a very uneven surface. But it does wonders for creating random, jagged textures for rocks. it gives a flat wide stroke. We continue to draw all the new layers. Use Blu-Tack (nag) to create thin sections. Use an electric eraser to create small patches of light. I mentioned in step 1, you have to make sure that you mark all the dark areas of the stone before moving on to step 2. The reason is that if you have drawn the lines with a hard pencil, you will not be able to achieve black tones in this area.
Ready option.
Author Diane Wright, source (website)
Leave a Reply